A few months ago I created this twitter bot that retweets anything from a specified list of users. And guess what? It was only 17 lines of code. The reason I’m sharing this is because I think it’s crazy how online services charge at least $15 for a simple tool to create bots when you can just build your own. So are you ready?
Here’s what we’re going to use to build the bot:
- Node.js — install at https://nodejs.org/en/
- twit — Twitter API Client for node (believe me, it’s twit). https://github.com/ttezel/twit
Aaaand that’s basically it.
Creating an application
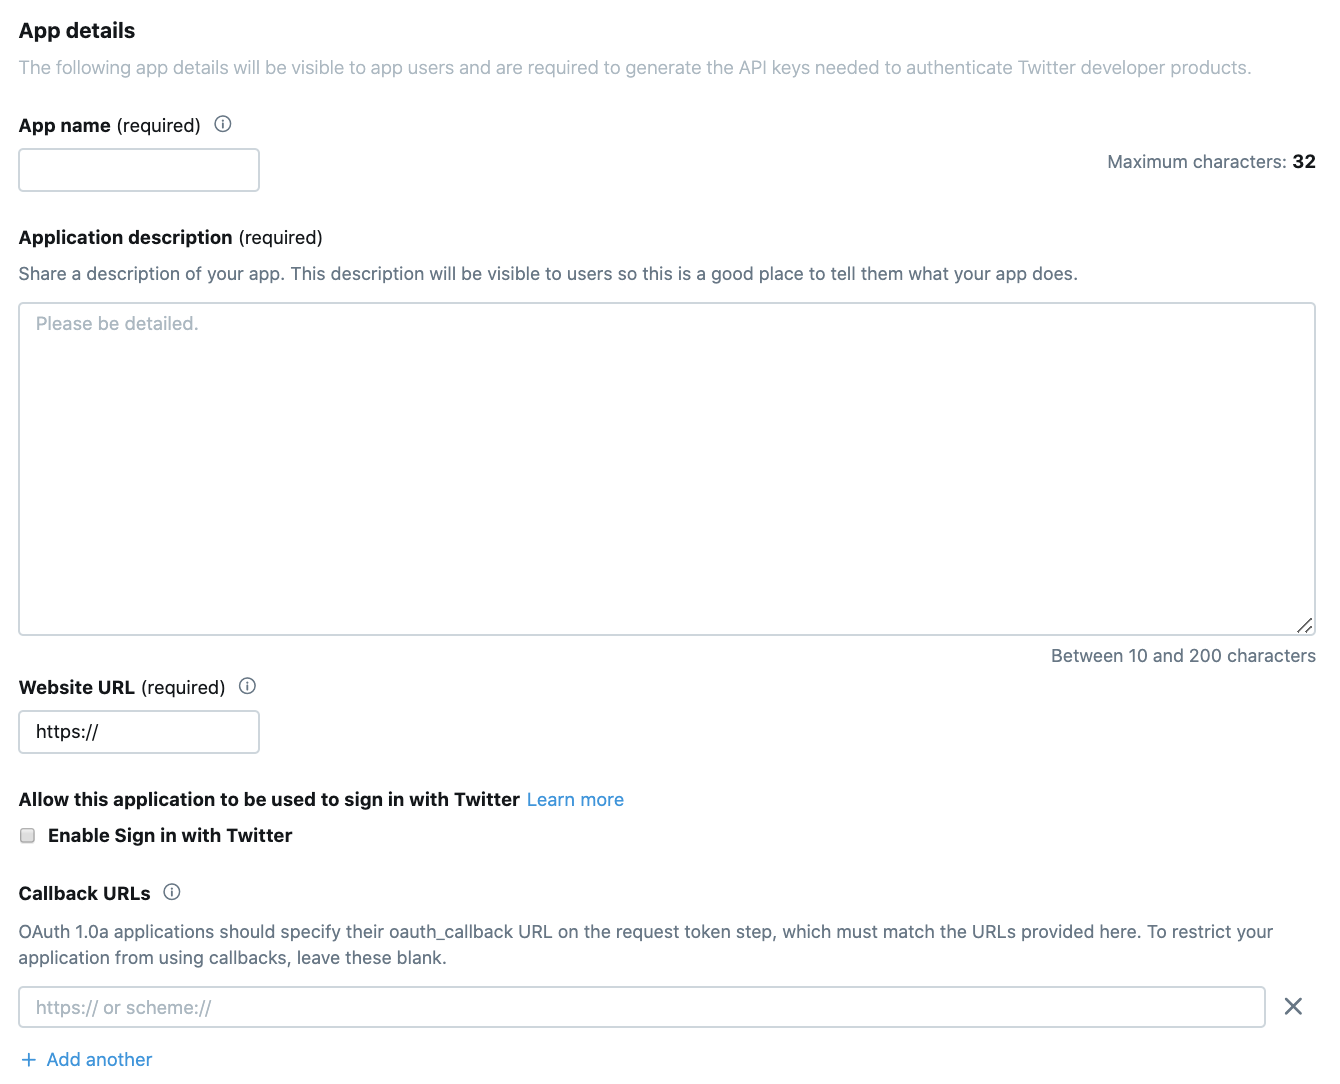
Before we get into writing code, we have to setup our Twitter application. You can do that at https://apps.twitter.com/. Press the “Create New App” button and this is what you’ll see:

Fill in the information. If you don’t have a website to put in the “Website” field, you can just write https://www.example.com. Once you create the application, there are 4 important things to note down over at the “Keys and Access Tokens” tab:
- Consumer Key
- Consumer Secret
- Access Token Key
- Access Token Secret
If you don’t see your “Access Token Key” and “Access Token Secret” just click the “Create my access token” button and you’ll be set.
Initializing the project
Open up CMD or Terminal and cd to a new directory for your twitter bot and execute the command:
npm init
and fill in the information. Next, we need to install the proper dependencies, in this case it’s only one:
npm install twit --save
Now create a file in that directory called index.js .
NOTE: If you changed the entry point when you ran npm init then make sure that the file name matches what you put in package.json. If you didn’t change anything, then don’t worry just call it index.js.
The fun part
Open up a blank text editor of your choice and create a Twit instance that can be used to make requests to Twitter’s APIs. The config should be an object of the form:
var Twit = require('twit')
var T = new Twit({
    consumer_key:         ' ... ',
    consumer_secret:      ' ... ',
    access_token:         ' ... ',
    access_token_secret:  ' ... ',
})
Replace the ' ... ' with your consumer and access keys.
Now create an array which holds the string IDs of the users you want to retweet (you can change the IDs I put in the code snippet below):
var users = ["10228272", "155659213", "783214"];
Now we’re going to create a stream which is in the form T.stream(path, [params]):
var stream = T.stream('statuses/filter', {follow: users});
Notice that in the second parameter, for the key follow we set the value as the variable users.
Now we’re going to listen to that stream when the event tweet is fired:
stream.on('tweet', function (tweet) {
    if (users.indexOf(tweet.user.id_str) > -1) {
        console.log(tweet.user.name + ": " + tweet.text);
        T.post('statuses/retweet/:id', { id: tweet.id_str }, function (err, data, response) {
            console.log(data)
        })
    }
})
This function is emitted each time a status (tweet) comes into the stream. Line 2 is necessary to ensure that the ID of the user who just tweeted is present in the array users.
Line 4 is basically using twit to retweet that tweet with an id of tweet.id_str . If you want to check out what other properties the tweet object has, you can head over to: https://developer.twitter.com/en/docs/tweets/data-dictionary/overview/tweet-object
Lets run the bot!
That’s basically it, You just created your first twitter bot in 17 lines of code! To run it, just execute this command in CMD or Terminal:
node index.js
Future updates
I’ll be writing another post later on which explains how to deploy your bot to Heroku so that you don’t have to run it on your local system 24/7.
Final code
var Twit = require('twit')
var T = new Twit({
    consumer_key:         ' ... ',
    consumer_secret:      ' ... ',
    access_token:         ' ... ',
    access_token_secret:  ' ... ',
})
var users = ["10228272", "155659213", "783214"];
var stream = T.stream('statuses/filter', {follow: users});
stream.on('tweet', function (tweet) {
    if (users.indexOf(tweet.user.id_str) > -1) {
        console.log(tweet.user.name + ": " + tweet.text);
        T.post('statuses/retweet/:id', { id: tweet.id_str }, function (err, data, response) {
            console.log(data)
        })
    }
})